


Acrylic nail extensions remain one of the most requested nail services in the beauty industry. Their durability, versatility, and endless design possibilities make them a favourite choice for clients who want longer, stronger, and more beautiful nails.
If you’re interested in becoming a nail technician or simply want to understand the professional process, learning how to do acrylic nail extensions is an essential skill. This guide walks you through the tools you’ll need, the step-by-step application process, and where you can receive professional training.
What Are Acrylic Nail Extensions?

Acrylic nail extensions are artificial nail enhancements created by combining acrylic liquid (monomer) and acrylic powder (polymer). When mixed together, they form a pliable bead that hardens naturally in the air, creating a durable extension over the natural nail.
Unlike press-on nails or gel polish, acrylic extensions are sculpted and shaped to suit each client, making them one of the most versatile nail enhancement systems available.
Benefits include:
- Strong and durable
- Customisable length and shape
- Excellent foundation for nail art
- Easy to maintain with regular fills
- Suitable for clients with weak natural nails
What Tools Are Needed for Learning Acrylic Nail Application?
Before learning acrylic nail application, you’ll need the proper professional nail tools. Using high-quality products not only improves your results but also helps you build good habits from the beginning.
Essential Acrylic Nail Kit
Acrylic Powder (Polymer)
Available in clear, pink, cover pink, white, and various coloured powders.
Acrylic Liquid (Monomer)
This combines with the powder to create the acrylic bead.
Acrylic Brush
A quality Kolinsky acrylic brush (typically sizes 8–12) offers excellent control for bead placement and shaping.
Nail Tips or Nail Forms
These are used to extend the natural nail before acrylic is applied.
Nail Glue
Secures nail tips safely to the natural nail.
Nail File & Buffer
Used to shape the extension and smooth the finished surface.
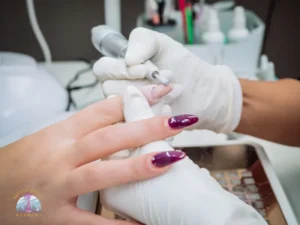
Nail Clippers and Tip Cutter
For trimming nail tips to the desired length.
Cuticle Pusher
Helps remove dead cuticle from the nail plate before application.
Nail Dehydrator and Primer
These products prepare the nail plate and improve acrylic adhesion, reducing lifting.
Dappen Dish
Used to hold the acrylic monomer during application.
Dust Brush
Removes filing dust before finishing.
Top Coat or Gel Top Coat
Protects the acrylic and provides a glossy finish.
Nail Lamp (Optional)
Only required if using a gel top coat.
Sanitising Supplies
Professional nail services should always include:
- Hand sanitiser
- Surface disinfectant
- Disposable towels
- Gloves (when appropriate)
The Process of Applying Acrylic Nails
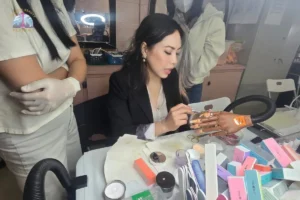
Professional acrylic application requires patience, precision, and consistent practice. Below is the standard salon procedure.
Step 1: Sanitize and Prepare
Always begin by washing and sanitising both your hands and the client’s hands.
Disinfect all tools before use.
Step 2: Nail Preparation
Proper preparation is one of the most important factors in preventing lifting.
The technician should:
- Push back the cuticles
- Remove dead cuticle from the nail plate
- Trim natural nails if necessary
- Lightly buff the shine from the nail
- Remove dust
- Apply dehydrator
- Apply primer
Skipping these steps can reduce the longevity of the acrylic set.
Step 3: Apply Nail Tips or Nail Forms
Depending on the desired extension:
Nail Tips
- Glue the tip securely.
- Blend the tip if needed.
- Cut to the desired length.
Nail Forms
- Position the form carefully under the natural nail.
- Ensure the form is aligned correctly before sculpting.
Step 4: Prepare the Acrylic Bead
Dip your brush into the monomer, remove excess liquid, then pick up a bead of acrylic powder.
The consistency should resemble a smooth, glossy bead—not too wet or too dry.
Learning proper bead control is one of the biggest skills beginner nail technicians develop.
Step 5: Apply the Acrylic
Place the bead onto the nail and gently press it into shape.
Most technicians work using three main beads:
- Cuticle area
- Apex (stress area)
- Free edge
Blend each bead smoothly together while maintaining the proper nail structure.
A correctly built apex helps the nail remain strong and resistant to breaking.
Step 6: Allow the Acrylic to Cure
Unlike gel products, acrylic cures naturally in the air.
Do not begin filing until the acrylic has fully hardened.
Step 7: Shape and Refine
Use an e-file (if properly trained) or a hand file to refine:
- Sidewalls
- Apex
- Free edge
- Surface smoothness
Finish with a buffer for an even surface.
Step 8: Apply Colour or Nail Art
Once the nail is fully refined, you can apply:
- Gel polish
- Nail art
- Chrome
- Ombre
- French manicure
- Glitter
- Encapsulated designs
Step 9: Finish with Top Coat
Seal the finished nails with a high-quality top coat for durability and shine.
If using a gel top coat, cure it according to the manufacturer’s instructions.
Finish by applying cuticle oil to nourish the surrounding skin.
Common Mistakes Beginners Make
Learning acrylic nails takes practice, and mistakes are part of the process. Here are some common issues to avoid:
Using Too Much Liquid
Overly wet beads can flood the cuticle and weaken the acrylic.
Incorrect Nail Preparation
Poor prep is one of the leading causes of lifting.
Thick, Bulky Nails
Acrylic should be strong but not excessively thick. Focus on creating a balanced apex and smooth transitions.
Filing Too Aggressively
Over-filing can damage both the enhancement and the natural nail.
Poor Sanitation
Always follow proper infection control practices by disinfecting tools, maintaining a clean workstation, and using clean implements for every client.
How Long Does It Take to Learn Acrylic Nails?
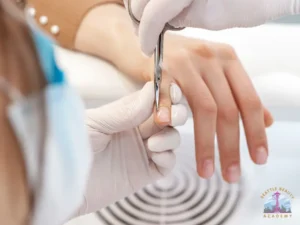
The learning timeline varies depending on the type of training and the amount of practice.
Generally:
- Basic acrylic application: A few weeks of consistent instruction and practice.
- Salon-ready skills: Several months of hands-on experience.
- Advanced shaping, speed, and nail art: Ongoing professional development.
The more models you work on, the faster your confidence and technique will improve.
Acrylic Nail Training at Seattle Beauty Academy
Learning acrylic nail extensions is more than mastering a technique—it’s the foundation of a rewarding career in the beauty industry. While online tutorials can introduce basic concepts, they cannot replace structured, hands-on training. Professional education provides direct feedback, proper technique, and a strong foundation in safety and client care.
At Seattle Beauty Academy, our Nail Technology Program provides the hands-on training, professional guidance, and practical experience you need to become a confident nail technician.
Students receive training in:
Gel, Acrylic, Dip, Hard Gel
Nail preparation and sanitation
Product chemistry and application
Nail shaping and structure
Gel polish techniques
Nail art fundamentals
Client consultation
Salon professionalism
Washington State licensing preparation
Working with experienced instructors allows students to develop confidence while practising on real models in a supervised setting.
Why Professional Training Matters
A career in nails requires more than learning how to apply products. Professional training helps you understand:
- Proper infection control procedures
- Nail anatomy and health
- Client safety
- Product selection
- Time management
- Customer service
- State licensing requirements
These skills can help prepare you for success in a professional salon or even when starting your own nail business.
Frequently Asked Questions
Is acrylic harder than gel nails?
Many beginners find acrylic more challenging initially because it requires mastering liquid-to-powder ratios and bead control. However, with proper instruction and practice, it becomes much easier.
How long do acrylic nail extensions last?
Acrylic nails typically last 2–3 weeks before requiring a fill, depending on the client’s nail growth and maintenance routine.
Can beginners learn acrylic nails?
Yes. With the right training, quality tools, and regular practice, beginners can build strong foundational skills and progress to advanced techniques.
Do I need a license to work as a nail technician?
Licensing requirements vary by state. In Washington State, nail technicians must meet the state’s education and licensing requirements before providing nail services professionally.
How long does it take to study a professional nail program in Seattle?
You have to complete 600 hours training at a licensed beauty school in Washington. You can learn more here about: how long does the manicure training program take